URL Redirecting / Forwarding 101
URL redirecting or URL forwarding… okay, so why should you care, right? As a blogger or online business owner, URL redirecting is actually important!
- Because you don’t want people trying to go to an inactive page on your website. If they see an error, they may give up and leave your site. You want your website to automatically redirect them to a better page, which would improve the their experience.
- Because you want your website to have a healthy (and functional) search presence. You want Google to like how your site is structured, and you want all the links to your site across the internet to actually take the visitor to a valid page on your website. URL redirecting can help improve your link quality of and ranking power.
- Because it helps paint a picture of the entire scope of your website. Did your website look different in the past? Did it have different content or architecture? There’s a good chance that some, most, or all of the links on your site have changed at some point in time. If anyone has ever shared your content, it was probably with those old links.
- Because it’s a good idea. Implementing URL redirecting is one of the most important parts of web-mastering. It’s a great idea to check on it at least once a month, but if you regularly remove products or pages from your site, it will probably need to be done more frequently. You want to make sure to redirect your website visitors to relevant links—something as close as possible to what they were originally trying to view.
How to Implement URL Redirecting:
(If you’d rather have me complete this for you, contact me!)
Otherwise, work through the steps below:
-
Identifying the Problem
- If you haven’t already, connect your site to Google Webmaster Tools / Search Console.
- Add A Property > Website > Type your web address, such as: https://www.strongwithpurpose.com
- Once you’ve added your website as a property, click on the website URL to go to the Search Console Dashboard.
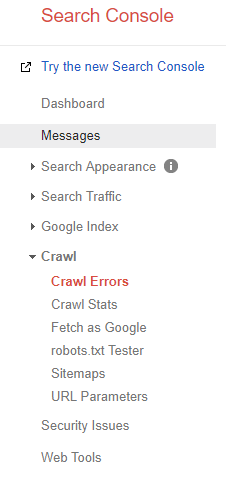
- Go to Crawl > Crawl Errors:

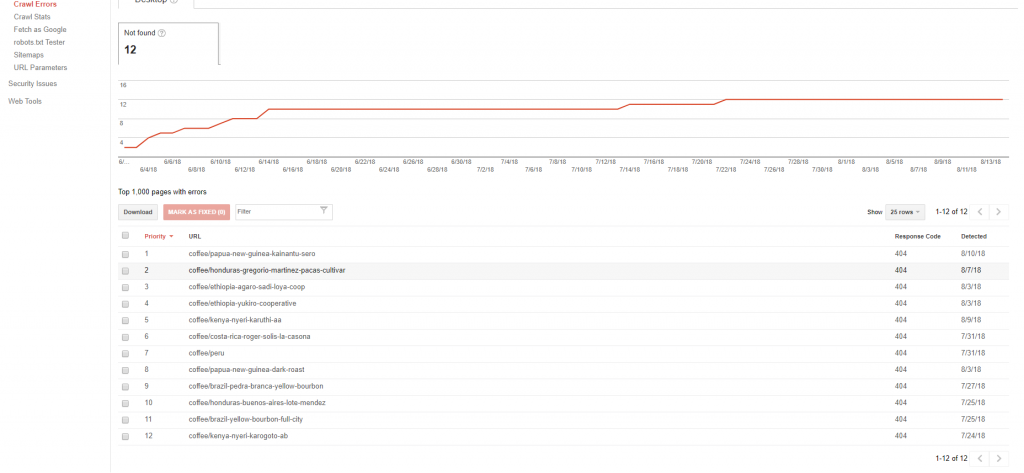
- View all of your URL errors:

-
MAKING A PLAN
- Click on each shortened URL to get the full URL for each error listed.
- Copy/paste a list of your old URLs into a document, before your desired URL redirecting.
- Decide which new URLs you want to redirect to.
-
Make THAT URL redirectING happen!
-
WordPress:
-
Install and activate the free plugin called Quick Page/Post Redirect Plugin
-
Click the Quick Redirects link in your WordPress console

-
Copy/paste each Request URL and Destination URL.
-
Request URL = The Old/bad/dead URL you no longer want people going to
-
Destination URL = The new/shiny/better URL you want to redirect people to
-
NW or NF = I choose not to use these options, which would force the link to open in a new window, or create a no follow link.

-
Input 3 redirects at a time, then click the Add New Redirects button.

-
- Continue inputting all the URLs you wish to redirect. Confirm that all desired URLs have been added by viewing the Existing Redirects list on the same page.
-
Test one of your redirects by visiting the old URL, and watching your browser redirect you to the new URL.
-
-
Squarespace:
-
In your Squarespace config, go to Settings > Advanced > URL Mappings:
 >
>  Make a list of all your desired redirects in the format of: original url -> new url 301
-
Copy/paste the list of all your desired redirects into the Squarespace code box and click Save.
-
Test one of your redirects by visiting the old URL, and watching your browser redirect you to the new URL.
-
-
Voila! There you have it. If you need any further tips or assistance, feel free to contact me.
If you enjoyed this tutorial, share it on Pinterest for other bloggers and online business owners to learn about URL redirecting!


